Table of Contents
ToggleA home theater is only as good as the view, and that’s where elevation comes in. If you’ve ever sat in the back row of a theater and found yourself craning your neck over someone’s head, you already understand the problem a home theater riser solves. Whether you’re setting up a dedicated media room or carving out a cozy corner in your living room, the right riser ensures every seat gets a clear sightline to the screen. This guide walks you through everything you need to know about selecting, sizing, and installing a home theater riser that works for your space and budget.
Key Takeaways
- A home theater riser elevates rear seating rows to ensure clear sightlines and prevent neck strain, mimicking the rake angle of commercial cinemas.
- Tiered platform risers cost $2,000 to $8,000 and work best for dedicated theaters, while individual motorized seat risers ($800–$3,000 per seat) offer flexibility for rentals and retrofits.
- Calculate the rise needed by measuring from floor to eye level when seated (typically 42–48 inches), then use 4–6 inches per row for two rows or 8–12 inches for three or more rows.
- DIY home theater riser installation requires careful floor joist inspection, proper structural support with blocking every 4 feet, and an elastomeric caulk seal to prevent creaks.
- Check local building codes and have a structural engineer review your plan if installing on an upper floor, as a loaded riser can weigh 500–1,500 pounds.
What Is a Home Theater Riser and Why You Need One
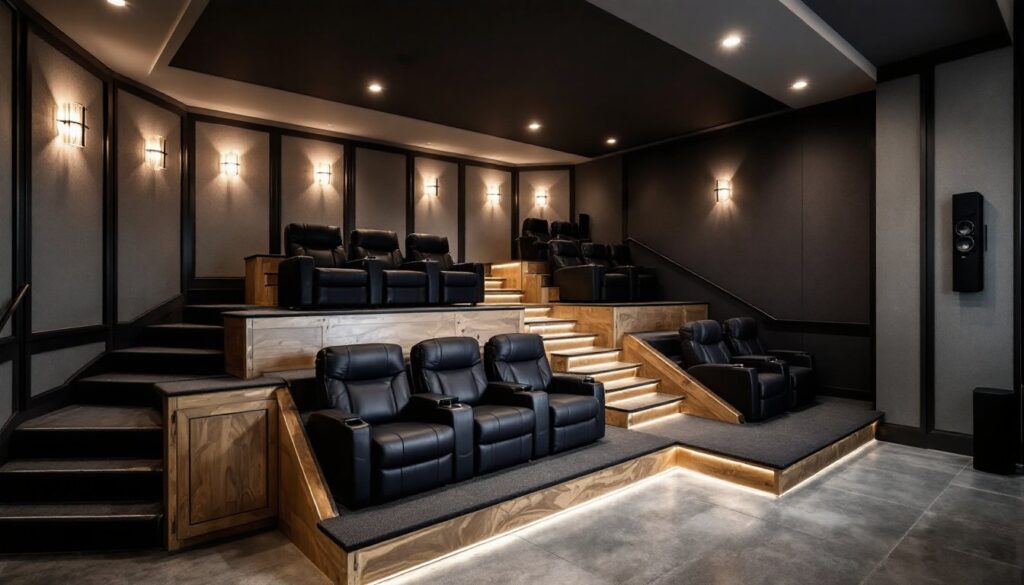
A home theater riser is a raised platform that elevates seating rows so rear-row viewers can see over the heads of those sitting in front. Unlike a generic stage platform, a theater riser is engineered specifically for comfort and safety, with proper pitch angles, handholds, and structural support designed to carry multiple people and furniture simultaneously.
The primary benefit is sightline optimization. In a properly pitched riser setup, each row sits slightly higher and further back, mimicking the rake angle you’d find in a commercial cinema. This matters more than people realize, studies on home viewing comfort show that blocked sight lines create neck strain and reduce engagement with content.
Secondary benefits include improved acoustics (rear speakers sit higher for better dispersion), easier cable management (risers with built-in routing channels keep wires organized), and aesthetic appeal. A well-built riser looks intentional and finished, not like an afterthought. In rooms where space is tight, risers also create visual separation between seating zones without eating floor space.
You don’t necessarily need a riser if you have only two rows of seating or a very small room. But the moment a third row is in the picture, or if any viewer sits below screen height, a riser becomes a practical necessity rather than a luxury upgrade.
Types of Home Theater Risers
Tiered Platform Risers
Tiered platform risers are continuous raised platforms that support an entire row of seating. The riser sits on a steel frame or engineered lumber base and typically rises 6 to 12 inches per row, depending on the number of rows and screen distance. The top surface is finished with 3/4-inch plywood and carpet or vinyl covering, creating a finished floor that matches your theater’s design.
Platform risers are the standard choice for dedicated home theaters because they’re stable, allow flexible furniture arrangement, and look professional. They work best when built into the room during construction or as a major renovation, since they require floor reinforcement, proper drainage (if on a basement slab), and permanent electrical routing. Costs typically range from $2,000 to $8,000 depending on size, materials, and whether you hire a contractor, highly variable based on labor rates in your region.
Individual Seat Risers
Individual seat risers are mechanical platforms that elevate a single seat or a pair of seats, often with motorized recline and lift functions. They’re modular, meaning you can add or remove them without structural modification. Popular commercial options include power-lift recliners and platform-style seat bases.
Individual risers excel in retrofits, rental situations, or when your room layout shifts frequently. They’re also ideal if you want to test the idea of tiered seating before committing. The downside is that they’re more expensive per seat (typically $800 to $3,000 per power recliner), take up more floor space, and create a less unified aesthetic than a platform. They can also transmit vibration from one seat to another if not properly isolated.
How to Choose the Right Riser for Your Space
Start by measuring your room and determining screen placement. Your screen should sit at eye level when you’re seated in the back row. Calculate the vertical rise needed by measuring from the floor to your eye height when sitting (typically 42 to 48 inches from the floor), then subtract the screen’s mounting height. If the gap is more than 6 inches, you’ll need a riser.
Next, count your seating rows and estimate how many people will use the back rows regularly. A two-row setup often works fine with a modest 4 to 6-inch rise. Three or more rows typically need 8 to 12-inch rises per step. The pitch angle, the slope from front to back, should fall between 10 and 15 degrees for comfortable viewing without feeling too steep.
Consider your floor type and room structure. If you’re in a basement, confirm the slab is level and not prone to moisture before building a permanent platform. If you’re on a second floor, check that joists can handle concentrated live loads, a fully loaded riser with people and recliners can weigh 500 to 1,500 pounds. In most cases, a structural engineer should review your plan if you’re building on an upper floor.
Budget matters too. Platform risers are cheaper than individual motorized seats but require more upfront labor. If you’re renting or want flexibility, individual risers are the path forward even though higher per-seat cost. Finally, think about future changes. A permanent platform limits you, so if you think your room will evolve, modular seating might be wiser.
DIY Home Theater Riser Installation Tips
If you’re building a tiered platform riser yourself, start with a detailed plan. Sketch the riser layout, mark stud locations in your floor framing, and identify where utilities (electrical, plumbing, HVAC) run beneath. Beginner woodworking projects often underestimate utility conflicts, a call to your local permit office costs nothing and saves expensive rework.
Materials you’ll need: pressure-treated 2×10 or 2×12 joists for the frame (nominal sizes: actual dimensions are 1.5 inches by 9.25 or 11.25 inches), 3/4-inch exterior-grade plywood for the top, 2.5-inch construction screws, and carpet or vinyl flooring. For a typical 8-foot-wide by 12-foot-deep riser stepping up 8 inches, expect roughly 25 sheets of plywood, 120 linear feet of lumber, and 5 pounds of screws. Costs run roughly $1,500 to $3,000 in materials alone, depending on your region and material grades.
Tools required: circular saw or miter saw, drill, level, tape measure, stud finder, and pneumatic nailer (or hand-drive screws if you prefer). Rent a nail gun if you don’t own one, it’s worth the $30 to $50 per day rental fee to avoid hand-driving 500+ fasteners.
Step-by-step process:
- Identify and mark all 16-inch on-center floor joists beneath where your riser will sit.
- Install rim joists around the riser perimeter, bolting or screwing them to existing floor framing every 16 inches.
- Run interior support joists parallel to the rim, again on 16-inch centers.
- Double-check that the frame is level using a 4-foot or 6-foot level, slope should be 0.5 to 1 inch rise per 8 feet forward (not sideways).
- Install blocking between joists every 4 feet perpendicular to the run. This prevents bounce and lateral movement.
- Lay plywood sheets perpendicular to joists, stagger seams, and screw every 8 inches along joists and blocking.
- Fill seams with elastomeric caulk to prevent nail pops and creaks.
- Install your flooring (carpet, vinyl, or epoxy) over the plywood. Don’t skip this, bare plywood telegraphs footsteps and looks unfinished.
Safety warnings: Wear safety glasses and work gloves throughout. Use ear protection when operating power saws and nail guns. Confirm electrical and plumbing are clear before drilling or cutting. Have a second person on hand, building a riser isn’t impossible solo, but bracing and holding plywood sheets is much easier with help. Finally, have the finished riser inspected by your local building department if your area requires a permit, many jurisdictions flag any structural modification to a main floor.
Conclusion
A home theater riser transforms how you experience movies and shows by ensuring every seat has a clear sightline and comfortable view angle. Whether you choose a permanent tiered platform or modular individual risers, the investment pays dividends in comfort and room usability. Start with honest measurements, check your local building codes, and don’t skip prep work, a riser built on a solid plan and sturdy foundation will serve your home theater for years without squeaks, wobbles, or regrets.