Table of Contents
ToggleA bathroom shower bath remodel is one of the most rewarding home improvement projects you can tackle, it’s personal, practical, and transforms a space your household uses daily. Whether you’re upgrading a tired 1990s tile situation or creating a spa-like escape, a solid plan separates projects that shine from those that frustrate. This guide walks you through budget planning, fixture selection, installation essentials, and finishing touches that turn an ordinary bathroom into a functional retreat. We’ll skip the Pinterest fluff and focus on what actually works, from material durability to ventilation that keeps mold away.
Key Takeaways
- Plan your shower bath remodel budget and timeline upfront—minor refreshes cost $2,000–$5,000 (2–3 weeks), mid-range projects run $8,000–$15,000 (4–6 weeks), and full gutwork exceeds $20,000 with extended timelines and permitting.
- Select quality fixtures like pressure-balancing or thermostatic valves ($150–$700) and slip-resistant tiles to prevent scalding and falls while meeting local code requirements for safety and water conservation.
- Prioritize waterproofing with cement board, waterproofing membrane, and proper ventilation (100+ CFM exhaust fan vented to exterior) to prevent hidden mold growth and ensure your remodel lasts decades.
- Invest in proper substrate preparation and rough-in work before finishing touches—cement board, waterproofing, and correctly positioned plumbing and electrical determine the difference between a polished remodel and one prone to moisture damage.
- Use caulk at transitions and corners where tile meets trim or pipes, as silicone caulk flexes with seasonal movement while grout cracks under stress, maintaining water integrity long-term.
- Layer lighting with recessed fixtures and wet-rated components, size exhaust ducting to exterior vents only, and include storage solutions like recessed shelves or grab bars to maximize functionality and comfort in your shower bath remodel.
Plan Your Shower Bath Remodel Budget and Timeline
Before ordering tile or demolishing walls, define your budget and realistic timeline. A minor refresh (new fixtures, paint, updated caulk) might cost $2,000–$5,000 and take 2–3 weeks. A mid-range remodel with new tile, fixtures, and plumbing adjustments runs $8,000–$15,000 over 4–6 weeks. Full gutwork with structural changes or custom features can exceed $20,000 and demand 8+ weeks plus potential permitting delays.
Be honest about what you can DIY versus what demands professionals. Plumbing, electrical work, and structural modifications often require licensed contractors and permits: cosmetic updates like tile and painting you can handle yourself with patience and proper technique. Get multiple contractor quotes if hiring, use sites like ImproveNet for project planning and Angi to find vetted service providers in your area.
Measure twice, order once. Account for material acclimation (let tile, lumber, and finishes sit in your bathroom for 48 hours before installation) and seasonal price swings. Add a 10–15% contingency buffer for hidden problems: once walls come down, rotted framing or outdated plumbing often surface.
Choose the Right Fixtures and Finishes
Showerheads and Valve Systems
Your showerhead sets the daily mood. Standard single-spray heads cost $20–$100 and deliver a tight, even spray. Rainfall heads (8+ inches wide) cost $80–$300 and provide luxe flow but demand higher water pressure: check your home’s PSI before committing. Handheld combinations let you rinse quickly or dial back pressure, useful for children or mobility concerns.
Valve systems are equally critical. Single-handle pressure-balancing valves ($150–$400) protect against scalding and maintain temperature if someone flushes a toilet mid-shower. Thermostatic valves ($300–$700) hold exact temperature even if inlet pressure fluctuates: they’re worth the premium if anyone in the household has sensitive skin or mobility issues. Install these at code-compliant depths and secure rough-in bodies to studs before drywall, repositioning later is a nightmare.
Check local codes: most jurisdictions require anti-scald protection (typically 104°F maximum delivery temperature for residential bathrooms) and water-saving aerators (2.0 GPM or less in many states).
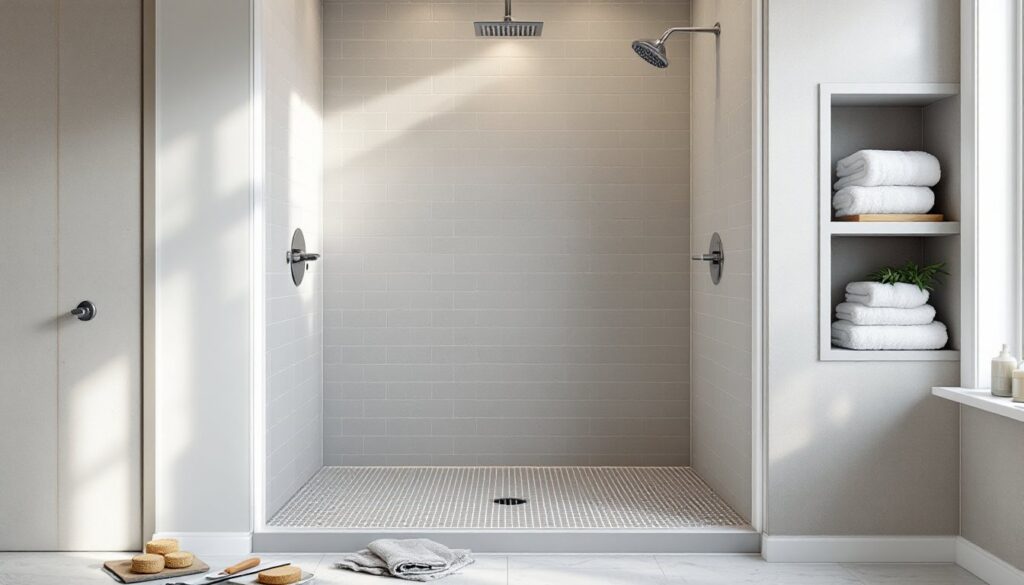
Tiles, Walls, and Flooring Materials
Ceramic tile ($1–$15 per sq. ft. installed) is durable, water-resistant, and easy to clean, the workhorse choice. Porcelain ($3–$20 per sq. ft.) handles moisture better and resists staining, making it ideal for shower floors prone to mildew. Natural stone (slate, marble, granite) looks elegant but demands sealing every 1–3 years and costs $10–$40+ per sq. ft.: reserve it for moisture-controlled accent walls unless you’re committed to maintenance.
Wall substrate matters: use cement board (Hardie Backer, DuRock) or waterproof drywall behind tile, not standard drywall. These cost a few dollars more per sheet but prevent water intrusion and mold. Schluter or comparable edge trim ($2–$5 per linear foot) protects tile corners and transitions, worth every penny for a finished look that lasts.
Non-tile options include acrylic surrounds (affordable, easy to clean, less durable) or solid surface panels. Waterproof paint and sealers exist but require meticulous prep and recoating every few years, proceed cautiously or stick to tile.
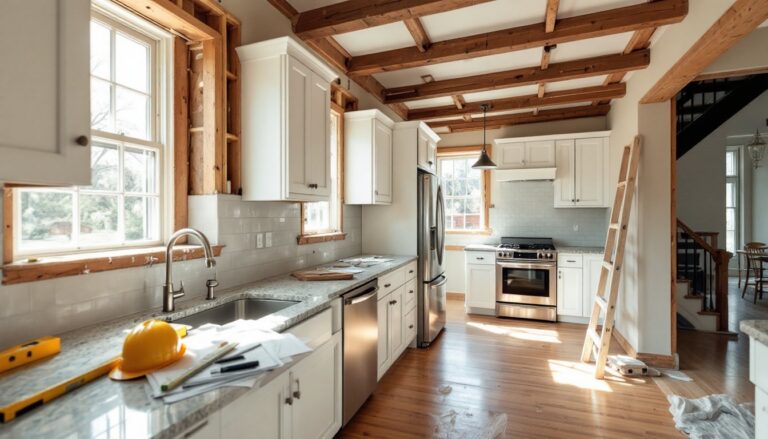
Essential Steps for a Successful Remodel
Start with demolition and planning. Turn off water at the main valve or isolate shutoff if your fixture has one. Remove old tile, fixtures, and substrate carefully: use dust containment (plastic sheeting and a shop vac with HEPA filter) to keep silica and mold spores contained. Wear a respirator mask, eye protection, and gloves during demo, tile dust and old caulk are hazardous.
Inspect framing once walls are bare. Look for soft spots (water damage), rotted studs, or plumbing that doesn’t meet modern code. Address these before moving forward: a contractor can spot issues a DIYer might miss.
Install rough plumbing and electrical next. Valve bodies, drain lines, and supply lines should be in place before any finished wall material goes up. Rough-in the lighting and exhaust outlet too, you’ll thank yourself later. Confirm all work passes inspection if required in your jurisdiction.
Lay cement board on studs (nail or screw every 8 inches per code), tape and mud joints if using drywall, and let it cure fully. Apply waterproofing membrane (like Schluter Kerdi or RedGard) over seams and up 6 inches beyond the future tile area. This isn’t optional for longevity, skipping it invites hidden mold.
Tile work demands patience. Use a notched trowel sized to your tile (typically 3/8″ for wall tile, 1/2″ for floor): apply thin-set mortar, comb it evenly, and press tiles with spacers. Let thin-set cure per manufacturer (usually 24 hours) before grouting. Non-sanded grout works for joints under 1/8″: sanded grout fills wider gaps and resists cracking.
Caulk, don’t grout, transitions and corners (where tile meets trim, pipes, or expansion areas). Silicone caulk flexes with seasonal movement: grout cracks under stress.
Install fixtures once all substrate and tile are complete. Running plumbing connections, mounting hardware, and securing the showerhead stem requires attention to depth and alignment, an extra hour of care prevents leaks. Seal any gaps around penetrations with waterproof caulk.
Maximize Functionality and Storage
Smart storage transforms a shower from efficient to exceptional. Recessed shelves (built into wall cavities during framing) cost $100–$300 and hold everything without eating floor space. Surface-mounted niches or corner shelves ($50–$200) work if you’ve already tiled but add visual clutter: they collect soap scum and demand frequent cleaning.
Shower caddies and tension rods are budget-friendly ($20–$60) and let you adjust placement later, a sensible first step if you’re unsure about fixed storage. Mount grab bars (required for universal design, ADA compliance) at 33–36 inches from the floor and 24–36 inches from the faucet centerline: they double as towel bars and cost $30–$100 depending on finish and diameter.
Flooring in the shower area should slope toward the drain at a minimum 1/4-inch-per-foot pitch. Tile with slip-resistant glaze (textured or higher-grit finishes) prevents falls better than glossy surfaces. A sloped curb or threshold contains splashing and keeps water off adjacent flooring, critical for longevity of surrounding materials. Discuss these details during planning: retrofitting slope after tile is nearly impossible.
Lighting and Ventilation Upgrades
Ventilation is non-negotiable. Most bathroom moisture problems stem from inadequate exhaust fans. Size yours at 1 CFM (cubic feet per minute) per square foot of bathroom area, a typical 100 sq. ft. bath needs at least 100 CFM. Larger bathrooms or those with enclosed showers benefit from 150+ CFM. Ductless fans ($100–$200) filter odor but don’t remove moisture: vented fans ($150–$400) exhaust humid air to the exterior and prevent mold growth.
Run exhaust ducting to the outside (attic or soffit vents risk blowing moisture into cavities). Install an inline damper to prevent back-drafts. Use rigid ductwork when possible, flex ducts attract mold spores and reduce airflow. Commission a qualified HVAC tech if you’re unsure about sizing or ductwork: undersizing is a common, costly mistake.
Lighting matters for both mood and function. Recessed fixtures ($30–$80 each, installed) above the shower provide task lighting without creating shadows. Add a bathroom exhaust fan with integrated LED lighting ($200–$350) for dual function in tight spaces. Layer lighting: bright task lighting over the vanity, softer ambient light elsewhere. Ensure fixtures are wet-rated (rated for high moisture) and up to electrical code, bathrooms have strict grounding and GFCI outlet requirements.
Consider a heated floor mat ($300–$800) or radiant heating in the floor substrate if budget allows: it’s transformative on chilly mornings and reduces moisture condensation. Install it before tile, not after. A small towel warmer ($100–$300) adds luxury without major cost. These upgrades aren’t essential but elevate everyday comfort significantly. Keep all work within code, improper electrical installations in bathrooms are a genuine safety hazard and may not pass inspection. For guidance on electrical updates, reference HomeAdvisor for cost estimates and contractor vetting.
The Path to Your Dream Shower Bath Remodel
A bathroom shower bath remodel rewards careful planning and honest assessment of your skills. Break the project into phases if budget is tight: prioritize waterproofing and structural soundness first, finishes second. Don’t rush demo or prep, they determine whether your remodel looks polished in year one or develops mold by year three. Focus on fixtures and materials that balance durability, maintenance, and personal comfort. With a clear budget, quality materials, and attention to detail, you’ll create a functional, beautiful space your whole household will enjoy daily.