Table of Contents
ToggleThe Onkyo HT-S3700 is a 5.1 channel home theater receiver and speaker package that brings cinema-quality sound to living rooms without requiring a second mortgage. This all-in-one system pairs a capable receiver with five dedicated speakers and a subwoofer, making it an accessible entry point for DIYers tired of thin TV audio. Whether you’re setting up your first dedicated movie corner or upgrading from soundbar basics, this guide walks you through unboxing, setup, and optimization. We’ll cover what ships with it, how it performs, where to position everything, and whether it’s the right fit for your space.
Key Takeaways
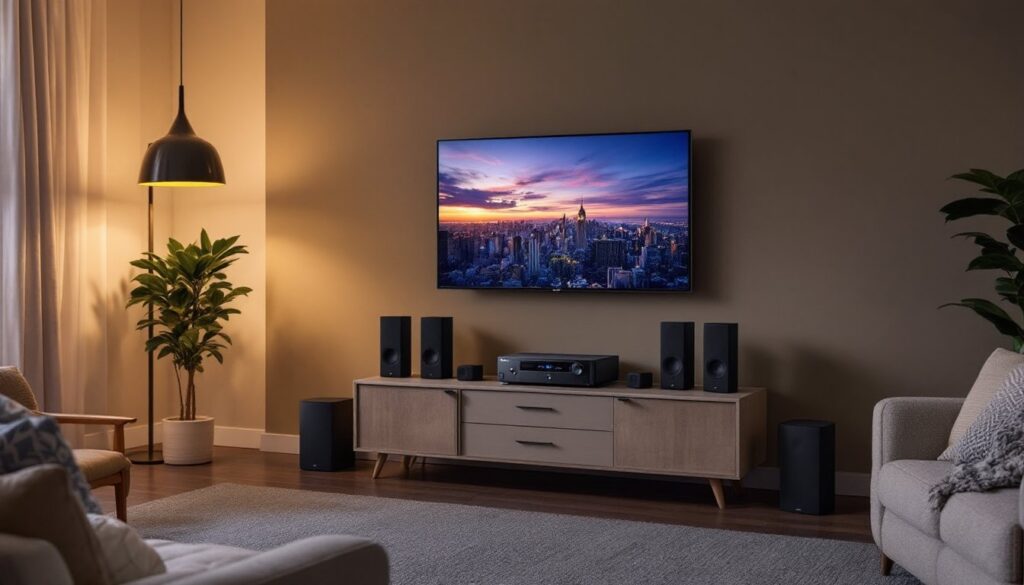
- The Onkyo HT-S3700 5.1 channel home theater receiver package delivers genuine surround sound with a center channel, front speakers, surrounds, and powered subwoofer, making it an accessible upgrade from TV speakers or soundbars.
- Proper speaker placement is critical: position the center channel at ear level below or above your TV, front speakers at 22–30 degrees from center, surround speakers 1–2 feet above ear level at 90–110 degrees, and the subwoofer anywhere in the room since bass is non-directional.
- Run the on-screen speaker setup wizard during initial power-on to ensure proper gain levels, phase alignment, and distance compensation, a five-minute step that prevents unbalanced dialogue and muddy bass.
- The HT-S3700 works best in mid-sized living rooms (150–300 square feet) and is not expandable with additional channels like Atmos, so consider your space and future upgrade plans before purchasing.
- Connect your cable box, Blu-ray player, or streaming devices directly to the receiver’s HDMI inputs, then run a single HDMI cable to your TV, simplifying your setup and cable management.
- Keep the receiver well-ventilated with 4–6 inches of clearance on sides and back to prevent heat buildup, and expect moderate power consumption of 120–150 watts during typical listening sessions.
What You Get in the Box
The Onkyo HT-S3700 package ships as a complete bundle, not a piecemeal collection. You’re receiving one Onkyo TX-SR393 receiver, a center channel speaker, two front left and right speakers, two surround speakers, and one powered subwoofer. All speakers are compact and black, designed to blend into typical living room furniture rather than dominate the space.
The receiver includes a standard infrared remote and an HDMI cable. Most setups also benefit from speaker cables (typically 14 or 16 gauge) to connect satellites to the receiver, these often aren’t included, so budget $10–$15 for quality ones if you’re starting from scratch. The subwoofer connects via a single RCA cable, also usually included or easily obtained.
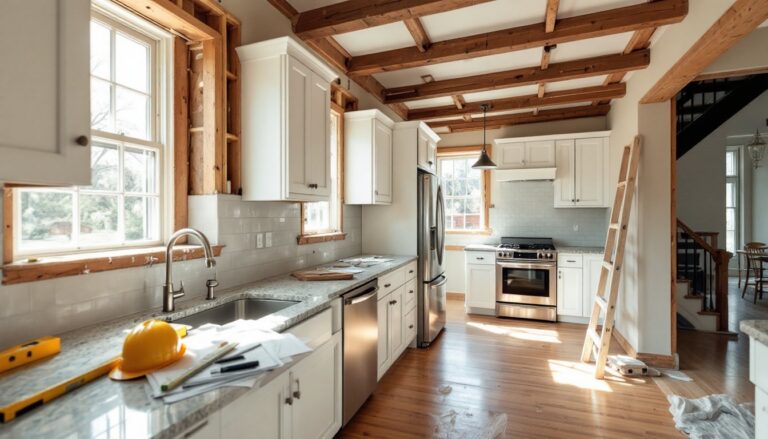
One practical note: unpack everything and keep the boxes for at least 30 days. If a speaker arrives damaged or the receiver powers up with errors, returns are painless with original packaging. Set speakers upright on a stable surface during the unpacking phase: surround speakers especially shouldn’t be dropped or laid flat, as internal components can shift.
Sound Quality and Performance
The HT-S3700 delivers genuine surround sound, not simulated spatial audio. The center channel handles dialogue, dialogue, and front-stage clarity, critical for movies and TV. Left and right fronts provide stereo separation for music and ambient sounds. The surround speakers add immersion during action sequences, helicopter scenes, or background environmental effects. The powered subwoofer handles bass reproduction, from subtle rumbles to explosive impacts.
Real-world performance depends on your room size and source material. In spaces under 200 square feet, this system produces adequate volume for movie nights without neighbor complaints. Larger rooms may feel underpowered at moderate listening levels, but that’s a limitation of the price point, not a design flaw. Streaming apps like Netflix deliver compressed 2-channel or 5.1 audio: Dolby Digital content from Blu-ray or cable boxes fully leverages the surround setup.
The receiver accepts HDMI inputs from streaming devices, game consoles, and cable boxes, automatically detecting format and distributing to speakers. This means you don’t need a separate processor, everything feeds through one device. Bass response is tuneable via the subwoofer’s built-in level dial, so you can dial it down if you live in an apartment or boost it for action-heavy viewing.
Easy Installation and Placement Tips
Setup begins with identifying your TV location and working backward. The center speaker sits directly below or above the screen, ideally at ear level when seated. Front left and right speakers flank the TV at roughly 22–30 degrees from center, slightly elevated if wall-mounted. Don’t place these on shelves directly beside your seating: angle them toward the listening area instead.
The powered subwoofer can live almost anywhere in the room, bass frequencies are non-directional, so corner placement, under furniture, or beside the entertainment center all work. Experiment with position after initial setup: moving the sub 12 inches in any direction sometimes reveals tighter, cleaner bass.
Surround speakers belong 1–2 feet above ear level when seated, typically 90–110 degrees to each side. Wall brackets simplify mounting and keep cables neat. Use drywall anchors or studs if fastening to walls: don’t skimp on hardware here, as falling speakers ruin projects and hurt people.
Positioning Your Speakers for Maximum Impact
Room layout matters enormously. Hard surfaces like tile or glass reflect sound and create echoes: soft furnishings like couches and curtains absorb it. If your space feels boomy or thin, don’t immediately blame the system, rearrange pillows, curtains, or area rugs to absorb excess reflection before resigning the setup.
Measure distances from your listening spot to each speaker. Ideally, fronts should be equidistant from your primary seating, and surrounds should be slightly farther than fronts. The receiver’s speaker setup menu includes distance compensation, which electronically delays certain channels so sound waves arrive at your ears simultaneously. Set distances in feet or meters as prompted on the TV screen, accuracy here improves imaging and prevents the soundtrack from feeling “disconnected” from on-screen action.
Cable routing often gets overlooked but saves frustration. Run speaker cables along baseboards or inside existing cable trays, not across floor traffic areas where they’ll be tripped over. Secure cables with velcro straps or adhesive clips, leaving slack near connections in case you need to adjust speaker position.
Connectivity Options and Setup
The TX-SR393 receiver offers 3 HDMI inputs, optical digital audio input, and analog RCA inputs. HDMI is the modern standard, it carries both video and audio from a single cable, simplifying your cable mess. Plug your cable box, Blu-ray player, or streaming device directly into a receiver HDMI input, then run one HDMI from the receiver to your TV.
Optical input works for devices that don’t have HDMI, like older Blu-ray players or some streaming devices. Analog RCA inputs are legacy options, useful mainly if you’re integrating vintage equipment or a turntable. Don’t overthink this, HDMI is your go-to unless you have a specific reason otherwise.
Initial power-on requires running speaker setup wizard on-screen. You’ll answer questions about room size, speaker configuration, and listening distance. The receiver then sets proper gain levels and phase alignment. This five-minute routine is non-negotiable, skipping it leaves you with unbalanced dialogue or muddy bass.
For Bluetooth connectivity, the receiver supports wireless audio streaming from phones and tablets. Pair your device once, then switch between HDMI and Bluetooth as needed. This flexibility means casual music listening or podcasts stream wirelessly without unplugging anything. According to home automation reviews from Tom’s Guide, modern receivers increasingly prioritize wireless input flexibility alongside traditional connections, reflecting how contemporary living rooms blend physical and streaming media.
One important safety note: keep the receiver ventilated. Don’t enclose it in a cabinet with doors, as heat buildup shortens component lifespan. Leave 4–6 inches clearance on sides and back.
Is This the Right System for Your Home
The HT-S3700 suits mid-sized living rooms (150–300 square feet) where dedicated movie watching and occasional music listening happen. It’s compact enough for apartment setups without dominating décor. If your space is smaller, studio apartments or dorm rooms, the system’s surround speakers and subwoofer may feel overkill, and a quality soundbar would suffice.
Conversely, large open-concept spaces or dedicated media rooms might benefit from separates or upscale packages. The HT-S3700 isn’t expandable: you can’t add rear surrounds or height channels later without replacing the entire system. So if you anticipate upgrading to Atmos-enabled surround formats, plan ahead.
Power consumption is moderate, the receiver idles at roughly 30 watts and draws 120–150 watts at typical listening levels. It’s fine to leave powered on for several hours, though energy-conscious users should turn it off when not in use. Budget roughly $3–$5 monthly in electricity if running 4 hours daily.
Reliability data from home tech product reviews and user forums suggests the HT-S3700 holds up well over 3–5 years of regular use. The weak point is sometimes the subwoofer amplifier, which can fail after sustained use. Budget for potential repair or replacement if the sub stops responding after warranty expiration.
The system works with standard home decor and fits budget-conscious projects. Unlike boutique audiophile gear, this isn’t designed for critical listening or mastering: it’s a practical, no-fuss solution for enjoying movies and streaming content the way they’re intended. If that aligns with your viewing habits, it’s a solid investment.
Conclusion
The Onkyo HT-S3700 transforms living room audio without requiring an electrician, structural changes, or professional calibration. Unbox it, mount speakers thoughtfully, run the setup wizard, and you’re done, typically a one-person two-hour project. The honest reality: this isn’t high-end cinema-quality sound, but it’s genuine surround audio that substantially outperforms TV speakers and entry-level soundbars. For homeowners building a modest media corner or upgrading dated TV audio, it’s straightforward and reliable. Plan your speaker placement before drilling, keep cables organized, and you’ll enjoy years of improved movie nights and cleaner dialogue in dialogue-heavy shows.