Table of Contents
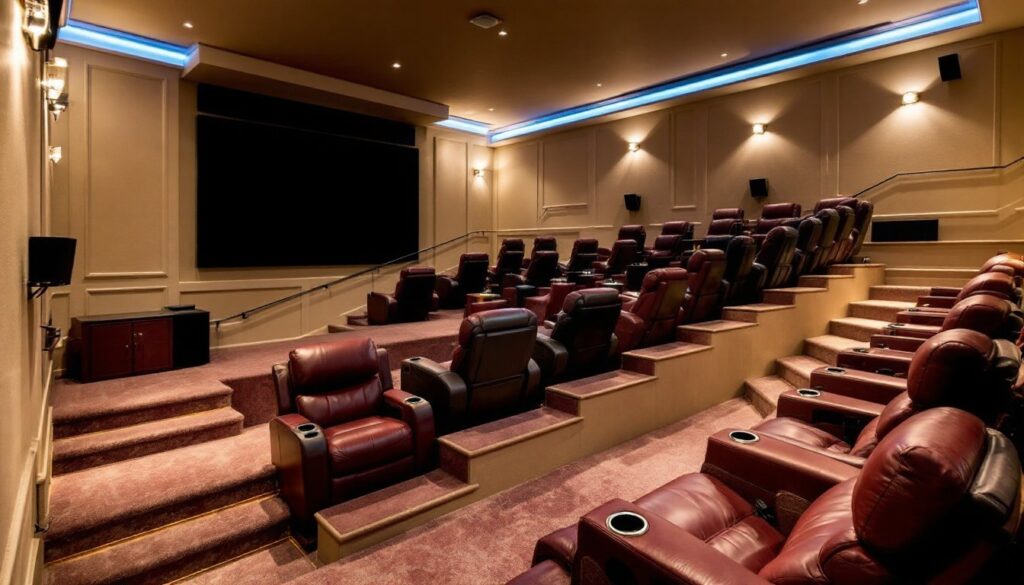
ToggleA dark room, a massive screen, and the surround sound hitting just right, that’s the dream. But here’s the catch: you’re craning your neck over the person in front of you, or worse, sitting on a sofa designed for browsing Netflix, not for a three-hour movie marathon. Home theater stadium seating fixes this. It’s the difference between a nice media room and an actual cinema in your basement. Stadium seating elevates sightlines, improves viewing angles, and turns your home theater into the gathering spot everyone wants to hang out in. Whether you’re building from scratch or upgrading an existing setup, this guide walks you through the why, the how, and the specific choices that’ll make it happen.
Key Takeaways
- Home theater stadium seating arranges chairs in ascending rows to eliminate sight-line problems and neck strain, ensuring every seat has an unobstructed view of the screen.
- Stadium seating typically requires 12–24 inches of height difference between rows with a 6–10-degree viewing angle, making it essential to plan room measurements and ceiling height before construction.
- Tiered seating improves acoustics by naturally dispersing sound and reducing bass buildup, while also maximizing seating capacity in a fixed room footprint.
- Quality power recliners ($600–$2,000 per seat) and custom theater seating ($1,500–$4,000+ per seat) are ideal for stadium seating, with leather or vinyl upholstery being the most practical for maintenance.
- Platform construction requires pressure-treated lumber joists, proper anchoring to existing floors, and carpet or vinyl flooring to dampen sound and create a premium cinema experience at home.
- Careful planning with floor measurements, CAD software, local building codes verification, and final sightline testing from each seat are critical to transforming your home theater into an exceptional entertainment space.
What Is Home Theater Stadium Seating?
Stadium seating, also called tiered or raked seating, arranges chairs in ascending rows so each seat sits higher than the one in front of it. Think of a movie theater: the second row sits up higher than the first, giving everyone an unobstructed view of the screen. In a home setting, this typically means a 12- to 24-inch step up between each row, depending on your room’s height and layout.
The key difference from a regular room is the intentional height difference, not just furniture placement. This elevation isn’t accidental: it’s built into the floor structure itself. A raised platform or stepped floor becomes the foundation. You then place recliners, sectionals, or custom theater seating on these levels.
The math is straightforward: if someone sitting behind you can’t see the screen because your head is in the way, stadium seating solves that. The angle of elevation ensures sightlines clear the row in front. Most home theaters use a 6- to 10-degree viewing angle, which translates to roughly 10–12 inches of rise per 5–6 feet of depth.
Why Stadium Seating Matters for Your Home Theater
Comfort without compromise is the core appeal. In a traditional flat-floor home theater, back-row viewers miss parts of the screen. Front-row viewers get neck strain. Stadium seating eliminates both problems by giving every seat an optimal sightline to the screen.
The psychological impact matters too. Stadium seating feels intentional and premium. It signals to guests, and to yourself, that this room is a dedicated space for entertainment, not a bedroom with a TV bolted to the wall.
From a practical standpoint, stadium seating also improves acoustics. The stepped design naturally disperses sound, preventing the flat-wall echo problems that plague traditional rectangular rooms. Tiered rows break up standing waves and reduce bass buildup in corners.
Finally, it maximizes seating capacity in a fixed footprint. You can fit more chairs into the same room because each row doesn’t need as much floor depth. A 12-by-16-foot room might hold three flat rows of two seats, or two tiered rows with four seats per row. The numbers work in stadium seating’s favor.
Planning Your Stadium Seating Layout
Start with measurements. You need your room’s length, width, and ceiling height. Measure from the back wall (where the screen will be) to the front wall (where you’ll sit). This gives you your depth budget.
Then reverse-engineer the layout. A typical row needs 4–5 feet of depth (measured from front of one chair to back of the next). If you want two rows, you’re looking at roughly 8–10 feet of depth. Add another 2–3 feet for screen clearance and wall space, and you’ve accounted for 10–13 feet of a room’s length.
Next, plan the height increments. If your room is 9 feet tall and you’re using an 8-foot-wide screen, you have about 1 foot of vertical clearance above the screen. Typical stadium seating rises 12–18 inches per step. Two rows work in most basements: three rows require 10+ feet of ceiling height.
Create a rough floor plan on paper or using free CAD software like LibreCAD or SketchUp. Mark the screen, note seat locations, and sketch the platform edges. This prevents costly mistakes. Ensure your plan leaves 18–24 inches of walking space behind the back row and along the sides.
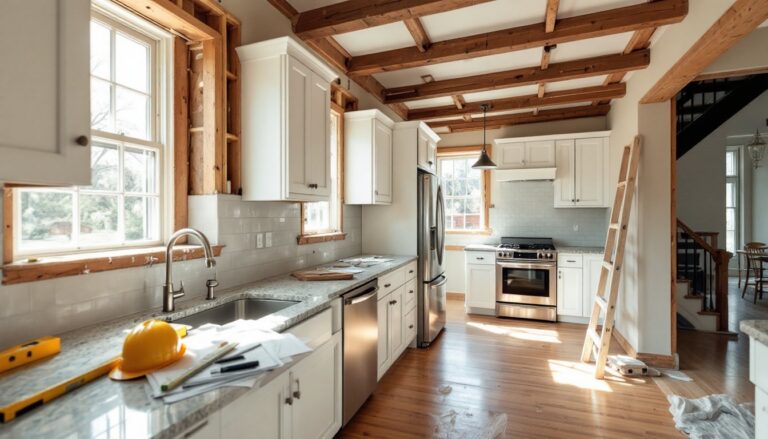
Consider door swings and electrical outlets. Moving a wall is a bigger job than moving a seating plan. Finally, check local building codes, platform construction may require permits in your jurisdiction, especially if it raises the floor more than 12 inches or involves structural changes.
Choosing the Right Seating Furniture
Your seating choice shapes the whole experience. There are three main categories: recliners, sectionals, and custom theater seats.
Power recliners are the most popular for home theaters. Models like massage-enabled, heated, or fully flat-laying options exist, but stick to motorized reclining action for reliability. Manual recliners get fatiguing after repeated use. Budget $600–$2,000 per seat for quality, depending on features. These fit well on tiered floors because their legs don’t need much clearance.
Sectional sofas work if you prefer a bed-like experience and don’t need individual reclining seats. They’re good for casual viewing and family hangouts but less ideal if someone wants to nap while others watch. Sectionals occupy more floor space per person, so stadium seating becomes less efficient.
Custom theater seating, fixed rows of individual motorized seats, feels most like a cinema. These are pricey ($1,500–$4,000+ per seat) but offer premium aesthetics and durability. Brands often provide stadium-seating-specific models with arms, cup holders, and built-in lighting.
Material matters. Leather or faux leather resists spills and cleans easily. Fabric offers more color variety but stains more readily. In a dedicated theater, leather or vinyl makes maintenance simpler.
Seat width is critical. Standard recliners are 32–36 inches wide: wider models run 40+ inches. Measure your available space, then buy accordingly. Oversized seats in a tiny row create awkward spacing.
Many reviewers recommend checking the best home theater seating for 2024 to compare current models and user feedback before purchasing.
Installation and Setup Tips
Platform construction is the heavy lifting. You’re building a raised floor section. If your rise is under 12 inches and the platform doesn’t span a load-bearing wall, you may not need a permit, but verify with your local building department first.
Use pressure-treated lumber for the frame: 2×8 or 2×10 joists set 16 inches on center. This handles the weight of people, seats, and equipment. Bolt the frame to the existing floor if possible, or use concrete anchors if you’re in a basement on a slab. The subfloor typically uses 3/4-inch plywood, screwed (not nailed) to the joists. This prevents squeaks.
Cover the subfloor with underlayment, typically 1/2-inch plywood or engineered underlayment rated for the flooring you’ll install. This prevents moisture wicking and extends floor life. Then install your finished flooring (carpet, vinyl, or wood). Carpet is popular because it dampens sound, hides imperfections, and feels comfortable underfoot.
Stairs or ramps connect the levels safely. A 4–6-inch rise per step is comfortable: steeper gets risky. Three to four risers per platform edge is typical. Handrails are optional in most home settings but add safety and a polished look.
Electrical and HVAC need planning. Run power before you close walls or subfloors. Recliners need 120V outlets near each seat. HVAC ducting should route around the new structure to maintain airflow. Don’t block vents with platforms.
Final setup involves anchoring seats to the platform (if not freestanding), calibrating screen height so the center of the screen sits at eye level when seated, and testing sightlines from each seat. Sit in every chair and verify you can see the entire screen without leaning.
PhotoS galleries at Houzz’s home theater seating ideas showcase finished installations and can spark layout ideas.
Conclusion
Stadium seating transforms a home theater from functional to exceptional. It solves sightline problems, improves comfort, and creates a dedicated entertainment space that feels genuinely premium. The investment, in platform construction, quality seating, and proper installation, pays dividends every time you sit down. Plan carefully, measure twice, and don’t skip the platform build. Done right, your home theater rivals the cinema experience without the sticky floors or overpriced concessions.