Table of Contents
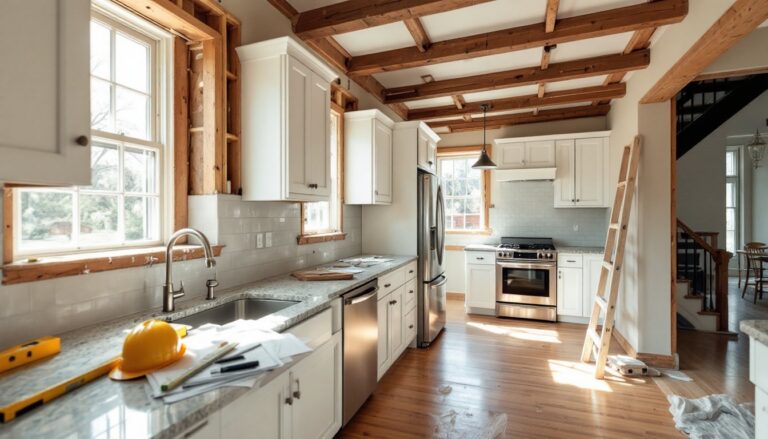
ToggleA deck without a railing isn’t just an eyesore, it’s a safety hazard. Whether you’re building a new deck or upgrading an old one, choosing the right Home Depot deck railing is one of the more important decisions you’ll make. The good news? Home Depot stocks everything from traditional wood railings to modern composite and metal options, and most DIYers can handle the installation themselves. This guide walks you through the available styles, helps you pick what works for your deck and budget, and covers the basics of getting it installed safely and correctly.
Key Takeaways
- Home Depot deck railing options span wood, composite, and metal materials, each offering different balances of cost, durability, and maintenance requirements.
- Building codes require railings to be at least 36 inches high (42 inches for elevated decks), with balusters spaced no more than 4 inches apart and top rails able to withstand 200 pounds of horizontal force.
- Composite railings eliminate the need for staining every 2-3 years, lasting 20+ years with minimal maintenance, though they cost 30-50% more upfront than treated wood.
- Proper installation requires exterior-grade fasteners, concrete footings for wood posts, and flashing to prevent water intrusion—critical details most DIYers can handle with the right tools and planning.
- Annual inspection of fasteners and railing connections prevents structural failure, as bolts loosen from freeze-thaw cycles, and a loose connection deteriorates faster with time and weather exposure.
Understanding Deck Railing Styles and Materials
Wood, Composite, and Metal Options Available
Deck railings come in three main material categories, each with trade-offs in durability, maintenance, and cost.
Wood railings remain the most popular choice for traditional decks. Home Depot carries pressure-treated lumber (typically 2x4s for the top rail and 2x2s for balusters) that resists rot and insect damage. Lumber species like cedar and redwood offer natural rot resistance and a warm aesthetic, though they cost more and require regular staining or sealing. Wood is easier to work with if you’re comfortable cutting and drilling, but plan on refinishing every 2-3 years.
Composite railings blend wood fiber and plastic, offering the look of wood without the constant maintenance. Brands like Trex, TimberTech, and Azek carry lines designed specifically to match Home Depot’s deck systems. Composite doesn’t require staining, resists fading better, and lasts 20+ years with minimal care. The tradeoff: composite costs 30-50% more upfront than treated wood. It’s also heavier, which matters if you’re fastening to existing structure.
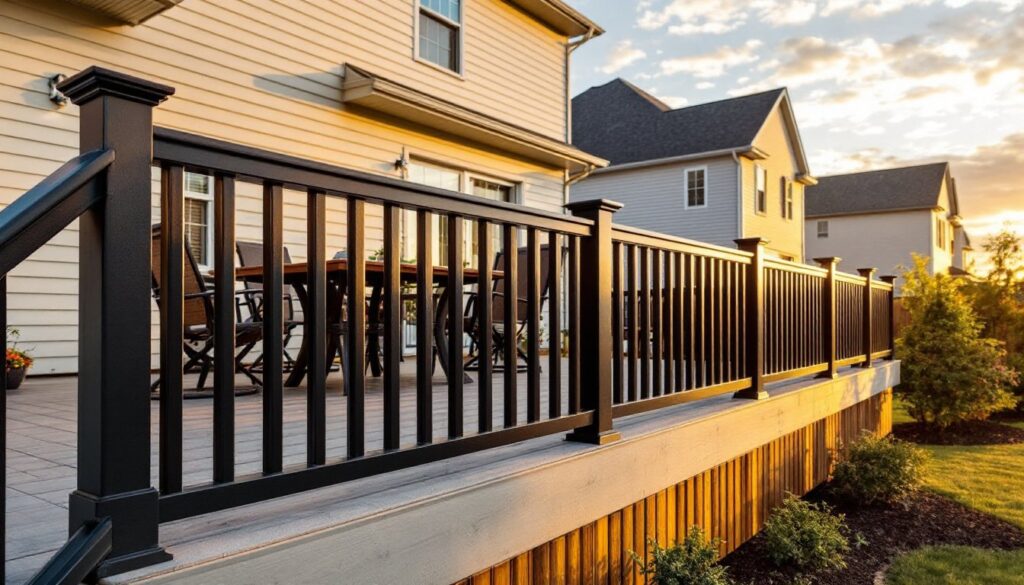
Metal railings in aluminum or steel provide a sleek, modern look. Aluminum is lightweight and rust-resistant, making it ideal for coastal climates. Home Depot stocks pre-assembled aluminum balusters and frames that simplify installation considerably. Steel offers maximum strength but requires periodic paint maintenance to prevent rust. Metal railings work well on composite decks and pair nicely with mixed materials.
Choosing the Right Railing for Your Deck
Code Requirements and Safety Considerations
Before you pick a style, understand the building codes that apply to your deck. Most jurisdictions follow the International Residential Code (IRC), though local codes vary, check with your county building department.
Key code requirements:
- Height: Railings must be at least 36 inches high, measured from the deck surface to the top of the rail (42 inches for decks over 30 inches high).
- Baluster spacing: The gap between vertical balusters cannot exceed 4 inches. This prevents a child’s head from getting stuck, it’s non-negotiable.
- Load resistance: The top rail must withstand 200 pounds of horizontal force without failure. Test this by leaning hard: a wobbly rail signals inadequate fastening or undersized lumber.
- Post spacing: Support posts typically shouldn’t be more than 6 feet apart.
If your deck is more than 30 inches above grade (ground level), you may also need a permit and inspection before and after construction. Cosmetic railing upgrades on existing decks sometimes slide by without permits in certain jurisdictions, but don’t assume. A quick call to your building department takes 10 minutes and saves you from costly removals later.
Home Depot’s pre-assembled railing kits come with load-rated components and often include instructions referencing IRC standards, which is a good sign. When shopping, look for railing packages rated for your deck height and post spacing, don’t improvise with undersized materials.
Installation Basics for DIY Enthusiasts
Most Home Depot railing systems are designed for DIY installation, though the process varies by material.
Wood installation starts with setting posts in concrete footings (4×4 pressure-treated posts are standard). Dig holes 24-36 inches deep, set the post in a premix concrete, and brace it plumb while it cures. Once the concrete sets (24 hours), attach the top and bottom rails using galvanized bolts and lag screws, regular fasteners will rust and fail in the weather.
Balusters (the vertical pieces) are typically 2x2s spaced 4 inches apart. Pre-drill every hole to prevent splitting, especially in pressure-treated lumber, which is prone to checking. If you’re not confident with spacing, ready made outdoor stairs from Home Depot can give you a sense of how pre-assembled components simplify layout.
Use exterior-grade fasteners: galvanized or stainless steel bolts for connections, 3-inch galvanized nails for baluster attachment. This prevents rust stains and structural failure down the road.
Composite and aluminum railings skip the concrete footwork. Most use surface-mounted brackets that bolt directly to the deck frame or existing structure. This is faster but requires precision drilling and proper flashing to prevent water intrusion into the deck ledger, a common source of wood rot.
When installing railings at deck edges, protect the rim joist and band board. Use flashing tape or metal flashing under the railing base to shed water away. Seal the bolt holes with exterior caulk after installation.
Tools you’ll need:
- Drill-driver (with bits for pilot holes)
- Circular saw or miter saw (for cutting rails and balusters)
- Tape measure and carpenter’s level
- Wrenches for bolts
- Socket set for lag screws
- Safety gear: gloves, eye protection, and a dust mask when cutting pressure-treated lumber
The step-by-step guide from This Old House covers framing and baluster layout in detail, and practical instructions from Family Handyman walks through actual fastening and spacing, both worth reading before you start.
A two-person job makes everything faster and safer, especially when holding long rails in place during fastening. Don’t skip the level, a railing that tilts visually is one that tilts structurally.
Maintenance and Long-Term Care Tips
Wood railings need the most ongoing care. Every 2-3 years, inspect for soft spots (sign of rot), check that fasteners haven’t loosened, and refinish with a quality exterior stain or sealer. Pressure-treated lumber doesn’t need staining for protection, but you’ll want to stain it for appearance and UV protection. Don’t paint wood railings intended for staining, paint traps moisture and accelerates rot.
Composite railings are nearly maintenance-free. A quick rinse with a garden hose once or twice a year removes dirt and mildew. Avoid pressure washers on composite, the high pressure can damage the material. If staining occurs, a soft-bristle brush and mild soap usually work.
Aluminum railings should be hosed down occasionally to prevent salt or mineral buildup. Touch up paint on steel railings as soon as rust appears, a small spot becomes a big problem fast in wet climates.
Inspect fasteners on all railings annually. Bolts loosen over time from freeze-thaw cycles and vibration, so tighten them before they get loose enough to affect safety. For wood railings, pay special attention to the areas where rails meet posts, these joints see the most stress.
If you notice any movement or flex in the railing when you push on it, stop and diagnose the problem before it worsens. A loose connection gets worse with time and weather.
Conclusion
Picking a Home Depot deck railing comes down to balancing budget, maintenance tolerance, and the look you want. Wood is affordable and timeless but needs regular care. Composite offers durability and low maintenance at a higher price. Metal suits modern designs and harsh climates. Whatever you choose, understand local codes, take time with installation, and inspect regularly. A solid railing is the difference between a deck that lasts 15 years and one that lasts 30.