Table of Contents
ToggleA 10×10 bathroom layout sits in that sweet spot where you’re not cramped for space but not oversized either. Most homeowners don’t get a sprawling master bath, so making smart decisions about fixture placement and storage here can transform your daily routine. Whether you’re renovating a powder room or planning a master bath 10×10 design, layout is where everything starts. Get this right, and your space feels spacious and functional. Get it wrong, and you’ll be squeezing past fixtures and wishing you’d planned better. This guide walks you through proven layout strategies, fixture spacing, and design tricks that work in this practical footprint.
Key Takeaways
- A 10×10 bathroom layout offers 100 square feet of practical floor space—enough for two people to move comfortably without cramping or wasting dead zones.
- Building code compliance requires at least 21 inches of clearance in front of the toilet and 15 inches from the sink, which directly impacts your fixture placement decisions.
- Vertical storage solutions like floating shelves, wall-mounted cabinets, and recessed niches maximize functionality in a 10×10 bathroom without consuming valuable floor space.
- The most functional 10×10 bathroom layouts follow proven patterns: One Wall Wet Zone for single-occupancy bathrooms, Split Configuration for multi-user flexibility, or Diagonal arrangements for irregular room shapes.
- Layer your lighting with ambient ceiling fixtures, task lighting flanked around mirrors, and an appropriately sized exhaust fan (80+ CFM) to prevent moisture damage and create a spacious feel.
- Light colors, satin finishes, vertical tile patterns, and large-format tiles make a 10×10 bathroom feel larger while mixed finishes add warmth without overwhelming the compact space.
Why Bathroom Size Matters For Layout Planning
A 10×10 bathroom gives you 100 square feet of floor space, roughly the size of a large walk-in closet. That doesn’t sound like much until you remember you’re fitting a toilet, sink, and shower or tub into it. Understanding this constraint upfront saves headaches later.
The magic of a 10×10 footprint is accessibility without waste. Unlike tiny powder rooms, you have enough room for two people to move around without bumping elbows. Unlike sprawling master suites, you don’t have wasted dead zones. Every inch counts, but you’ve got enough to work with.
Building codes, check your local International Residential Code (IRC), require clear floor space in front of fixtures. A toilet needs 21 inches of clearance from the wall, a sink typically 15 inches. These aren’t suggestions: they’re minimums that affect how you layout your space and whether permits will be approved if you’re adding plumbing.
Maximizing Storage In Compact Bathroom Design
Storage is the silent killer of bathroom comfort. Without it, you’re stacking bottles on the back of the toilet and shoving towels under the sink.
In a 10×10 bathroom, vertical storage is your friend. Floating shelves above the toilet (12-15 inches deep) hold towels and decor without eating floor space. Wall-mounted cabinets flanking the mirror add serious storage: aim for 24-30 inches of cabinet depth if your layout allows. Recessed medicine cabinets are another option, they fit between studs (standard spacing is 16 inches on center) and don’t jut into your walkway.
Built-in niches inside the shower or tub surround are underrated. A 12×12-inch niche carved into the wall between studs costs minimal material and gives you a home for bottles and soap. Just make sure waterproofing is flawless, use a moisture-resistant niche surround with sealed edges.
Don’t forget under-sink storage. A pedestal sink saves floor space but kills cabinetry underneath. A wall-mounted or vanity sink lets you tuck a cabinet (24-30 inches wide by 18-21 inches deep) where you actually need it. Drawers beat cabinets for access: you’re not reaching into dark corners as often.
Essential Fixture Placement And Spacing
Toilet, Sink, And Shower Positioning
There’s no universal “best” 10×10 bathroom layout because the door swing, window placement, and existing plumbing all matter. That said, certain placements are smarter than others.
Toilet placement sets the tone. Code requires 21 inches of clear space in front (center to front). Most folks place the toilet on the wall farthest from the door or entry to a corner for privacy. If your 10×10 space has the door on one end, put the toilet behind the door swing or at the opposite end. Never place it directly facing the entrance, bathroom guests will feel exposed.
The sink goes where lighting and plumbing are easiest. If you have existing plumbing on one wall, site the sink there to avoid rerouting drain lines. Plan 30-36 inches of counter depth if you want comfortable use. A 24-inch-wide vanity is standard: 30-36 inches is better if your layout allows. Mount the mirror 12-18 inches above the counter and scale it to match the vanity width, oversized mirrors make small bathrooms feel larger.
Shower or tub placement depends on your priorities. A 5-foot-long tub occupies 60 inches and 30-36 inches of width. A shower stall (typically 32×32 inches minimum, though 36×36 or larger is nicer) takes less linear wall space. Corner showers are space-efficient: you’re using two walls instead of one. If you’re tight on space, a shower-tub combo (5-foot tub with shower surround) gives you flexibility at the cost of one long wall.
Spacing between fixtures matters for usability. Aim for at least 15 inches between the sink and toilet (edge to edge). If your layout has a sink opposite a toilet, 24 inches of clear space between them makes the room feel roomier. Keep the shower or tub at least 18-24 inches from the toilet, cramming them closer feels claustrophobic and makes cleaning harder.
Popular 10×10 Bathroom Layout Configurations
Real-world 10×10 layouts typically fall into a few winning patterns. Knowing which fits your situation saves redesign later.
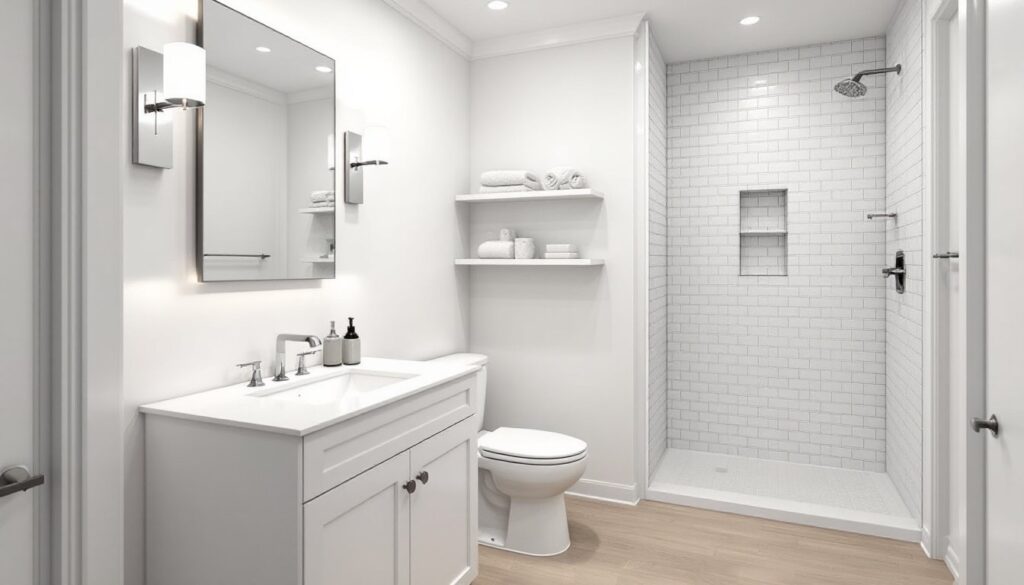
The “One Wall Wet Zone” stacks tub/shower, toilet, and sink along one wall. This works best if your 10×10 is closer to a rectangle (say, 8 feet by 12 feet) with the wet zone on the short wall. Plumbing is concentrated, easier to route, and you maximize open floor space opposite. The downside: if one person is showering, another can’t easily use the toilet. Best for single-occupancy or guest bathrooms.
The “Split Configuration” puts the toilet and sink on one wall, the tub/shower on the adjacent wall (forming an L-shape). This spreads out fixtures and gives you flexibility, two people can use the space at once without tangling. Plumbing routes around two walls, which costs more but is often worth it in master bath situations. Forums like those discussing 10×10 bathroom floor plans show this layout wins for functionality.
The “Diagonal” Layout angles fixtures to suit the room’s actual shape. If your 10×10 has a door at one corner or a window that breaks up walls, a diagonal arrangement can flow better than forcing a standard grid. Requires careful planning, draft it to scale first.
The “Galley” Style (long, narrow, like 5 feet by 20 feet) puts sink and toilet on one side, tub/shower on the other. It’s cramped to turn around in, but maximizes efficient use if space is truly linear. Avoid this if you have a true square 10×10.
Lighting And Ventilation Strategies
Poor lighting and ventilation will ruin even a perfectly planned layout.
Lighting in a bathroom needs layers. Ambient light comes from a ceiling fixture (recessed or flush-mount, 60-75 watts equivalent for a 10×10 space). Task lighting flanks the mirror, wall sconces on both sides are standard, 40-60 watts each. Dimmable bulbs are worth the upfront cost: morning light at full strength is different from evening light, and being able to adjust makes a small space feel less harsh. Install vanity lights at eye level when standing, typically 48-60 inches from the floor. Too high, and you cast shadows on your face. Too low, and they glare.
Ventilation removes moisture, which prevents mold and extends the life of paint, finishes, and fixtures. A bathroom exhaust fan sized for your room is essential. Calculate CFM (cubic feet per minute) at one air change per hour minimum, a 10x10x8-foot ceiling is 800 cubic feet, so you need at least an 80 CFM fan. Most bathroom fans are rated 80-120 CFM, so a standard model works. Duct the fan to the outside (not into the attic, that pushes moisture into framing). Run it during and 20-30 minutes after showers. Quieter fans (sone ratings below 1.5) make compliance easier.
Creating Visual Space With Color And Finishes
A 10×10 bathroom can feel generous or cramped depending on color and material choices. Design does the heavy lifting that layout alone can’t.
Light colors (soft whites, pale grays, muted blues) bounce light around and make the space feel larger. Dark colors absorb light and make walls feel closer. If you love a bold color, use it as an accent wall (behind the toilet or sink, not all four walls). Matte finishes hide imperfections but absorb light: glossy or satin finishes reflect light and feel more spacious. Semi-gloss or satin on walls and trim is a smart compromise, they wipe clean and brighten the space without being sterile or hard to maintain.
Materials communicate size, too. Subway tile (standard 3×6 inches) feels classic and can be laid vertically in a 10×10 to draw the eye upward (making ceilings seem higher). Large-format tiles (12×24 inches or bigger) are trendy and create fewer grout lines, making spaces feel more open. Matte tiles hide water spots better than glossy: glossy tiles are more reflective and lighter-feeling. Whatever you choose, ensure grout is sealed if it’s porous, bathroom moisture will stain unsealed grout quickly.
For a master bath 10×10 renovation, consider mixing finishes. Tile on walls around the tub or shower, paint elsewhere. A wood-look porcelain tile for the floor pairs well with painted walls, creating warmth and visual interest without overwhelming the space. Design resources like Homify’s interior design galleries offer real examples you can adapt.
Final Thoughts: Building Your Perfect 10×10 Bathroom
Planning a 10×10 bathroom layout is about ruthless prioritization. You can have a spacious shower, storage, and good lighting, but not all of them at maximum. Decide what matters most to your daily life, then design backward from there.
Start by sketching your layout to scale (0.5 inches = 1 foot is standard) on graph paper or in a free tool. Mark the door swing, windows, and existing plumbing. Rough in fixtures and measure twice. Show it to a plumber if you’re moving drains: they’ll spot conflicts early. Build in good lighting, ventilation, and storage from the start instead of retrofitting later, the money you save on regret beats budget overruns every time. Your 10×10 bathroom has plenty of potential: respect the footprint, plan smart, and you’ll use it happily for years.